HOW TO IMPORT BANK STATEMENTS IN A CUSTOM FORMAT

The most recent changes on bank statement imports to D365 F&O have brought to light the need for using Electronic Reporting instead of the Data Management framework. The deprecation of XSLT is the reason that the Generic Electronic Import format field is checked without having the option to edit it when setting up a bank statement format. Therefore, an import format configuration must be used.

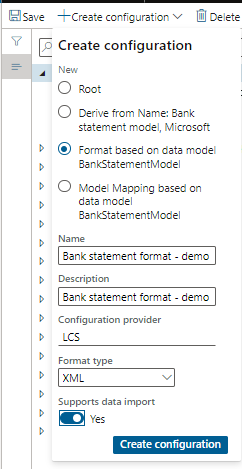
There are 3 pre-defined formats (BAI2, Camt.053, and MT940) that Microsoft allows to be customized for use when setting up the bank statement format. However, some banks have their own format that does not correspond to the standard ones. In such cases, the client is required to create their own structure based on the document received from the financial institution.


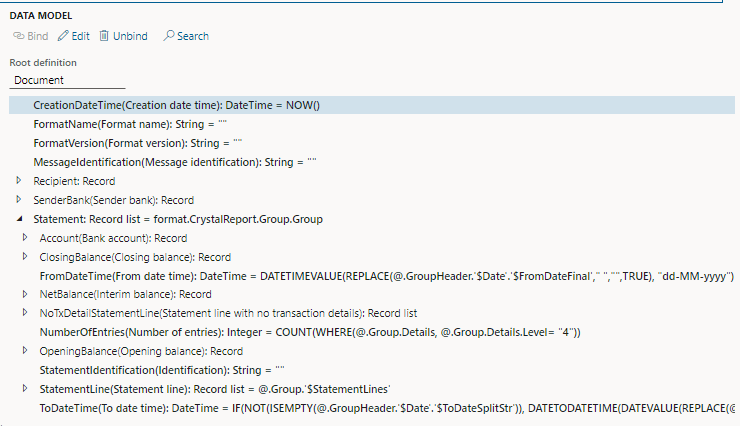
In this blog post, we will learn how to create a format from scratch and map it to the existing model. Yes, we can use the standard model mapping as it is, so we can upload the information we import. We just need to create the format design that should match the imported document's structure.


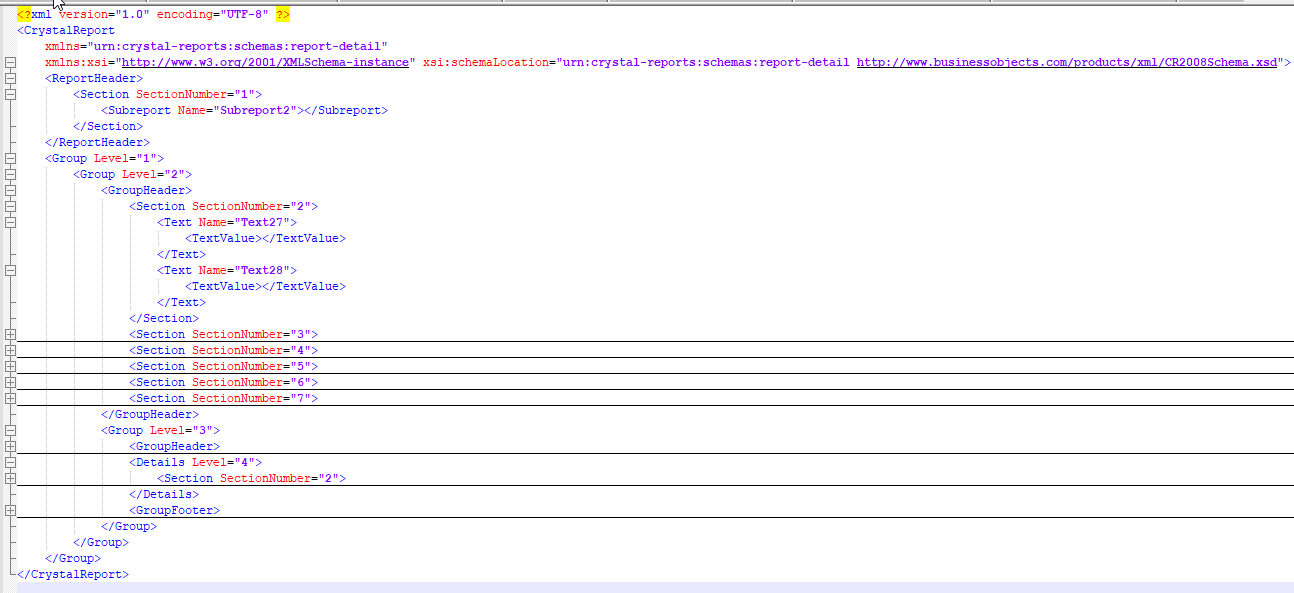
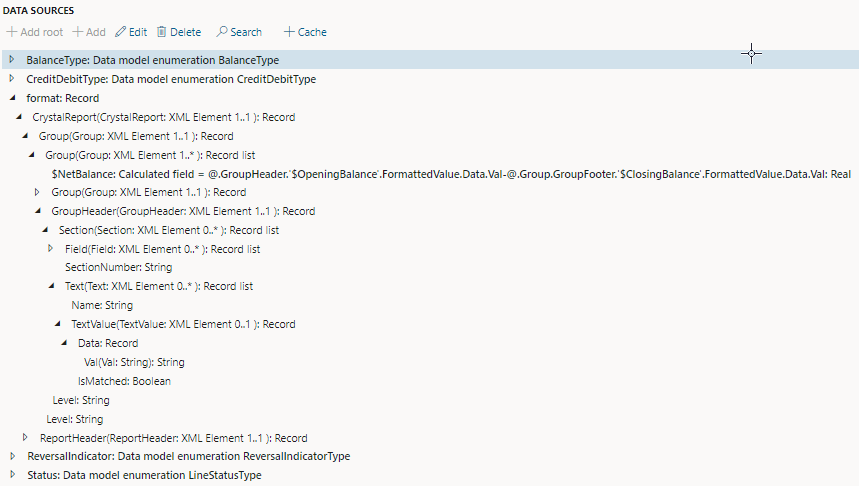
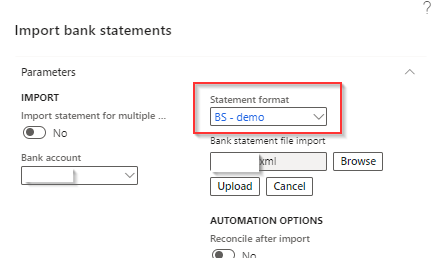
In this example, we will create a brand new XML structure, map its format to the bank statement model, and then test it out with an imported file provided by the financial institution.

01

First things first, we need to create a new format based on the standard model and then set "Supports data import" to Yes.

02

Moving on to the designer mode, we add the XML nodes exactly according to the format provided by the bank. The Camt.053 format is the best example to follow when it comes to creating and setting the multiplicity of the nodes.

For the custom format we have previously created, we added node by node. Whenever we had multiple sections present, such as the GroupHeader's Section Element, we set the Multiplicity to zero-many (0..*).

03

After creating the XML structure, we need to start mapping it to the model.

In Designer, we click the "Map format to model" button.

In the Model to Data source mapping form, we are required to include the following line, which will generate the standard mapping for the XML structure we have previously added.

The result will look like this:

04

Above, we discussed the Section Element node within the Group Header Element. Here, we observe that by setting the Multiplicity to 0..*, we create a Record list that will be looped through during the import process. Moving forward, we can populate the required information in the Data model fields, located on the right side, next to the data sources.

For instance, the Statement field expects a record list that will contain all the statements to be imported. In our case, this corresponds to the second-level group, which we have set as 1..*.

05

After creating all the necessary components and confirming the accuracy of the mapping, we can proceed to add a new Bank statement format record. We have the option to select the custom configuration that we have either completed or set the Run draft to Yes.

06

During the import process, we can simply select the statement format we have added and proceed to import the statement.

Our blog

Cactus

Latest insights & news from Falcon

Top

© 2024 Copyright: Falcon Trading